Friday 29 November 2013

Develop for Google Glass – 10 steps for a quick start

Develop for Google Glass – 10 steps for a quick start

noads

So you want to develop an APP for Google Glass? This is what you need to know.


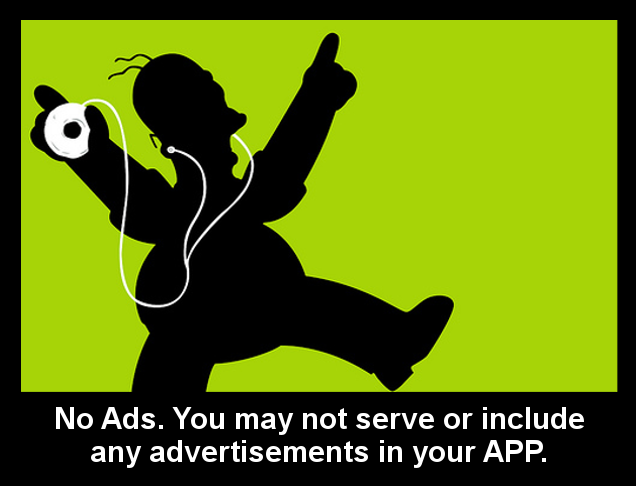
1. Check out this Infomeme about which apps you are not allowed to build

2. Take a look at the apps that others have already built

3. You don’t already have a Google Glass?

develop with the Google GLASS Emulator

4. You want a Google Glass asap?

Subscribe to our newsletter. You will be one of the first to know when google glass is available for purchase.


5. Also Follow this site on Google+ to get the latest news and app reviews


6. Play with Google Glass APPs dummies


7. Start with some simple code examples in your favorite programming language


8. Join the Google Glass developer community


9. Join a Google Glass Enthusiast Group near you to see what people are exited about


10. You have got the skills but no idea what to develop?

Check our crowd sourced Ideas at Google Glass APP Ideas

11. Watch all the google IO 2013 Google Glass session videos

visit this page of all the IO 2013 Google Glass Videos
- Voiding Your Warranty: Hacking Glass
- Building Glass Services with the Google Mirror API
- Fireside Chat with the Glass Team
- Project Glass: Icebreaker
- Developing For Glass


Please don’t just port your old android apps to google glass because glass is a totally new kind of gadget and its users need to be treated with care


Design for Glass

Glass is fundamentally different from existing mobile platforms in both design and use. Build your Glassware with this in mind, and design it specifically for Glass. Ensure the user experience is appropriate for Glass by testing on an actual device.
 

Don’t get in the way

Glass users expect the technology to be there when they want it and out of the way when they don’t. Do not annoy users with notifications that are too frequent or unexpected. Provide appropriate controls for your users, so they can interact with your Glassware when desired and ignore it when they don’t.
 

Keep it timely

Glass is a platform that is most effective when in-the-moment and up-to-date. Always deliver fresh and relevant content to users. You also have access to a real-time notification system that can inform your Glassware about certain events, such as when users delete or reply to timeline cards. If your Glassware responds to these notifications, do so in a timely and expected manner.
 

Avoid the unexpected

Surprising the user with unexpected functionality is bad on any platform, but especially on Glass, because it is so close to a user’s daily experience. Always be honest about the intention of your Glassware and get explicit permission before you do anything on the user’s behalf.

Incoming google glass search terms:

  • google glass app development
  • app develop for google glass
  • develop app for google glass
  • develop google glass aps
  • glass app developer

Wednesday 13 November 2013

How to manually update your Nexus tablet to KitKat

Android Central

With the right tools and a little knowledge, there's no need to wait for your OTA

The Android 4.4 update has started rolling out to the Nexus 7 and Nexus 10 tablets around the world. But if your tablet has yet to receive the update, then don't despair — we've got a quick walkthrough that'll get you updated in a few minutes, assuming you've got a little experience with a command line.
Note that this is for stock Nexus tablets, and for people who want to update without really doing any real hackery, but don't mind a little command line work. Nothing we do here is permanent, other than the update itself. If you've already flashed a custom recovery, you should be able to update manually using that, instead of our method. And with that...
Caution: This guide is intended for technically proficient users only. Proceed at your own risk. Dragons ahead, etc.

The prerequisites

  • A completely stock Nexus tablet running the latest build of Android 4.3
  • The latest version of the Android SDK installed
  • The OTA packages: Nexus 7 (2012); Nexus 7 (2013); Nexus 10 (Links will be added as they become available)
Check past the break to see the full manual update process.

The process

  1. Place the update .zip package from Google in the Android SDK/platform-tools folder on your computer, but do not unzip it.
  2. On your Nexus, go to Settings > Development options and switch the toggle on. Then enable USB debugging under the "Debugging" menu group.
  3. Power down your tablet
  4. Start up the bootloader by holding down volume up, volume down and power on your tablet.
  5. When the menu loads, plug your Nexus into your computer.
  6. Use the volume up/down keys to navigate to "Recovery mode", then press the power button.
  7. When the Android with the red exclamation point appears, hold down power first, followed quickly by volume up. You should now see the recovery menu. 
  8. Use the volume up/down keys to select "apply update from ADB," then press power to select it.
  9. On your computer, open up a command prompt or terminal window.
  10. Using the command line, navigate to the Android SDK/platform-tools folder 
  11. On Windows, type:
    adb.exe sideload <the complete name of the OTA zip file you want to flash>
    ... or on Mac, type:
    ./adb-mac sideload <the complete name of the OTA zip file you want to flash>
    ... or on Linux, type:
    ./adb sideload <the complete name of the OTA zip file you want to flash>
  12. The update should begin installing. When it's done, select "reboot system now."
  13. Enjoy some delicious KitKat

Saturday 12 October 2013

Android KitKat: the story behind a delicious partnership


On Tuesday Google announced that the next version of Android will be named "KitKat,"after the ubiquitous chocolate bars sold around the world. It's the first time a mainstream operating system has been given a licensed name, and the deal with trademark owner Nestle took time to complete: the BBC reports that Google director of Android global partnerships John Lagerling first called Nestle about the name in late November of 2012, and that the deal was only finalized at Mobile World Congress in Barcelona in February of this year. "We decided within the hour to say let's do it," said Nestle executive vice president of marketing Patrice Bula.
Zz4653a4ac
There's no exchange of money involved, but there is a significant promotional element: 50 million KitKat bars in 19 countries will have prominent Android branding and offer buyers the chance to win a Nexus 7 tablet and Google Play gift cards. All those wrappers started production two months ago in secret so they would be ready for the promotion; not even Google employees knew about the new name. "We kept calling the name Key Lime Pie internally and even when we referred to it with partners," Lagerling told the BBC. Adding to the air of intrigue, Nestle is commemorating the partnership with 500 specially-produced KitKats in the shape of the Android logo that the company claims took "weeks" to create in "a secret location in Europe."
"WE DECIDED WITHIN THE HOUR TO SAY LET'S DO IT."
But secret meetings in Barcelona and commemorative chocolates aside, the deal did have some wrinkles. Nestle owns and control the KitKat brand throughout the world, but Hershey's licenses the brand and manufactures the candy in the United States — obviously a key market for Google and Android. As the deal began to take shape with Nestle, Google also had to reach out to Hershey's and work out an arrangement. And while sources say the final deal is entirely between Google and Nestle, Hershey's KitKats and new KitKat minis in the United States will indeed carry the Android logo and giveaway information.
So why the name change? A Google spokesperson tellsThe Verge that KitKats have long been Android engineering head Hiroshi Lockheimer's favorite candy bar — his Gmail avatar was a KitKat icon several years ago. At one point in 2010, the Android team even decorated Lockheimer's entire office door with KitKats, pictured here. Given the wide variety of new wrappers and branding that will appear on KitKats throughout the world, it appears that another opportunity will soon be well at hand.

Tuesday 24 September 2013

Android Text to Speech

I developed a simple interface with one input field and a button to trigger a event that will take text from input field and speaks out.
Android text to speech
1. Create a new project by going to File ⇒ New Android Project. and fill required details.
2. Implement your main Activity class from TextToSpeech.OnInitListener
public class AndroidTextToSpeechActivity extends Activity implements TextToSpeech.OnInitListener {
3. Now add following code your class.
package com.androidhive.texttospeech;
 
import java.util.Locale;
 
import android.app.Activity;
import android.os.Bundle;
import android.speech.tts.TextToSpeech;
import android.util.Log;
import android.view.View;
import android.widget.Button;
import android.widget.EditText;
 
public class AndroidTextToSpeechActivity extends Activity implements
        TextToSpeech.OnInitListener {
    /** Called when the activity is first created. */
 
    private TextToSpeech tts;
    private Button btnSpeak;
    private EditText txtText;
 
    @Override
    public void onCreate(Bundle savedInstanceState) {
        super.onCreate(savedInstanceState);
        setContentView(R.layout.main);
 
        tts = new TextToSpeech(this, this);
 
        btnSpeak = (Button) findViewById(R.id.btnSpeak);
 
        txtText = (EditText) findViewById(R.id.txtText);
 
        // button on click event
        btnSpeak.setOnClickListener(new View.OnClickListener() {
 
            @Override
            public void onClick(View arg0) {
                speakOut();
            }
 
        });
    }
 
    @Override
    public void onDestroy() {
        // Don't forget to shutdown tts!
        if (tts != null) {
            tts.stop();
            tts.shutdown();
        }
        super.onDestroy();
    }
 
    @Override
    public void onInit(int status) {
 
        if (status == TextToSpeech.SUCCESS) {
 
            int result = tts.setLanguage(Locale.US);
 
            if (result == TextToSpeech.LANG_MISSING_DATA
                    || result == TextToSpeech.LANG_NOT_SUPPORTED) {
                Log.e("TTS", "This Language is not supported");
            } else {
                btnSpeak.setEnabled(true);
                speakOut();
            }
 
        } else {
            Log.e("TTS", "Initilization Failed!");
        }
 
    }
 
    private void speakOut() {
 
        String text = txtText.getText().toString();
 
        tts.speak(text, TextToSpeech.QUEUE_FLUSH, null);
    }
}
4. Now run your project and test your app by entering some text in input filed.
Changing Language
You can change language to speak by using setLanguage() function. Lot of languages are supported like Canada, French, Chinese, Germany etc.,
tts.setLanguage(Locale.CHINESE); // Chinese language
Changing Pitch Rate
You can set speed pitch level by using setPitch() function. By default the value is 1.0 You can set lower values than 1.0 to decrease pitch level or greater values for increase pitch level.
tts.setPitch(0.6);
Changing Speed Rate
The speed rate can be set using setSpeechRate(). This also will take default of 1.0 value. You can double the speed rate by setting 2.0 or make half the speed level by setting 0.5
tts.setSpeechRate(2);